To create a transaction in the Point Of Sale that will in turn create a job to the Workshop Calendar, please follow the steps below:
1) In POS, click the Set Customer button and add or create your customer;
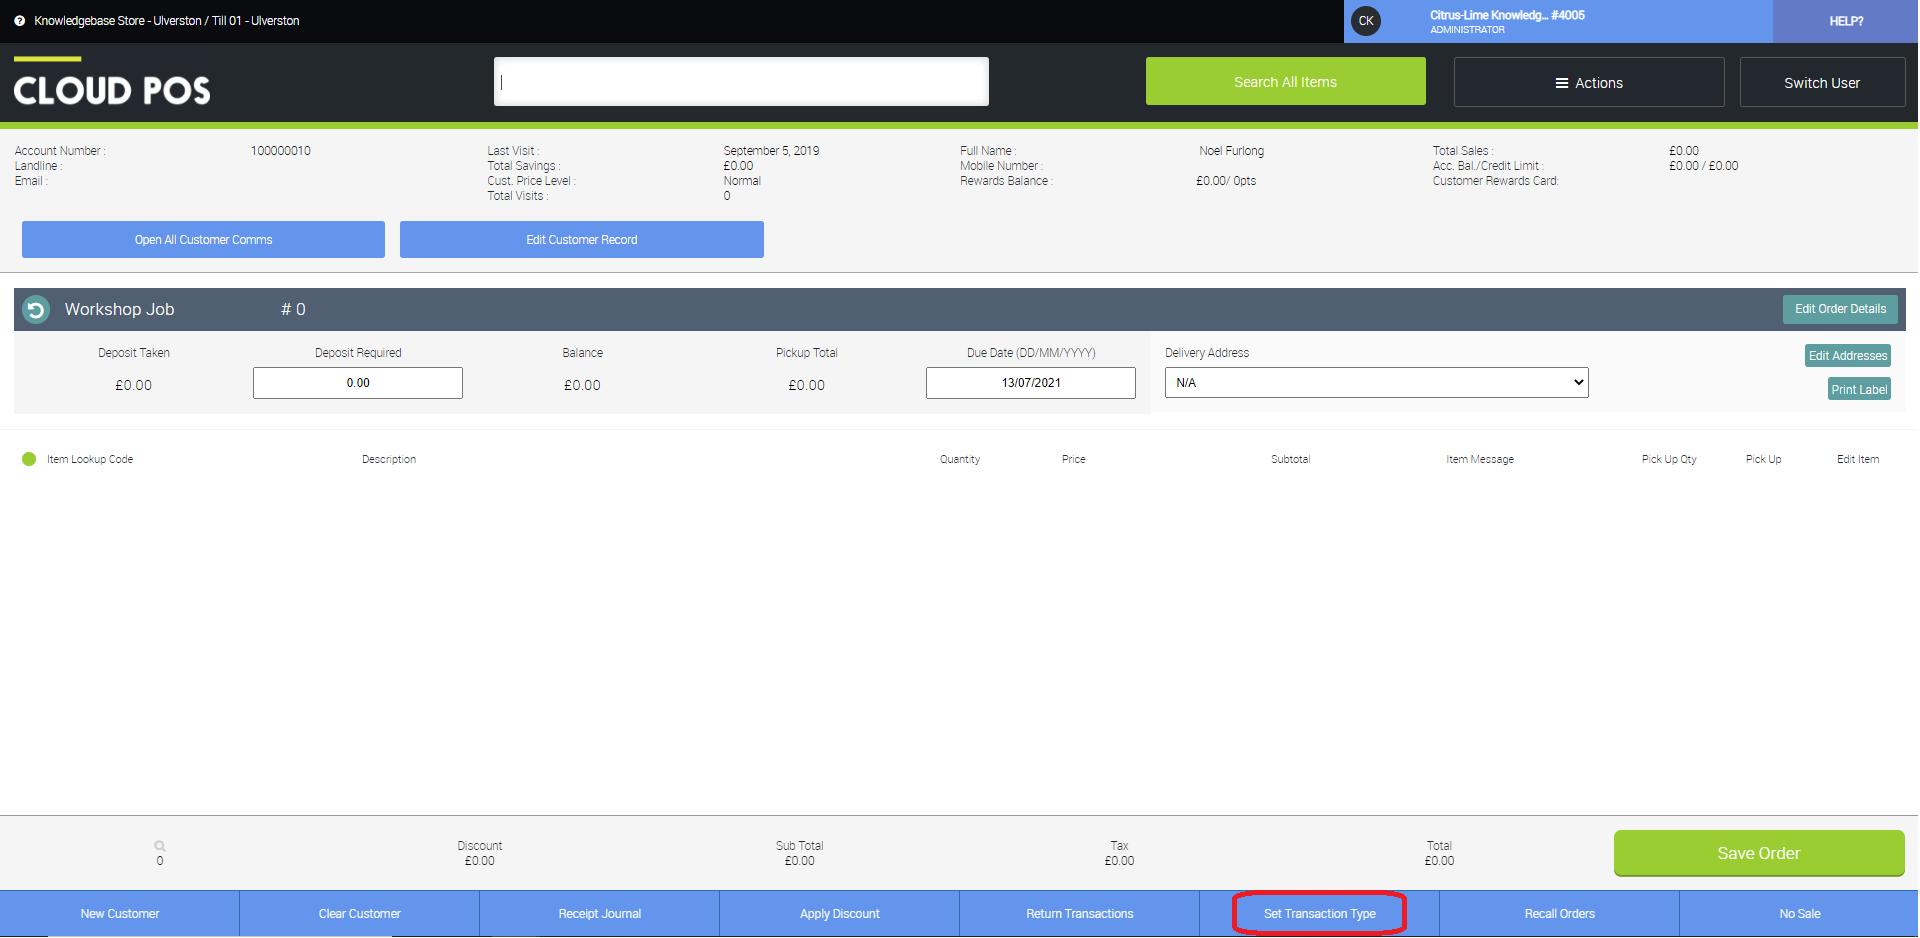
2) Locate and select Set Transaction Type, as shown in the image below:

3) Select Workshop;
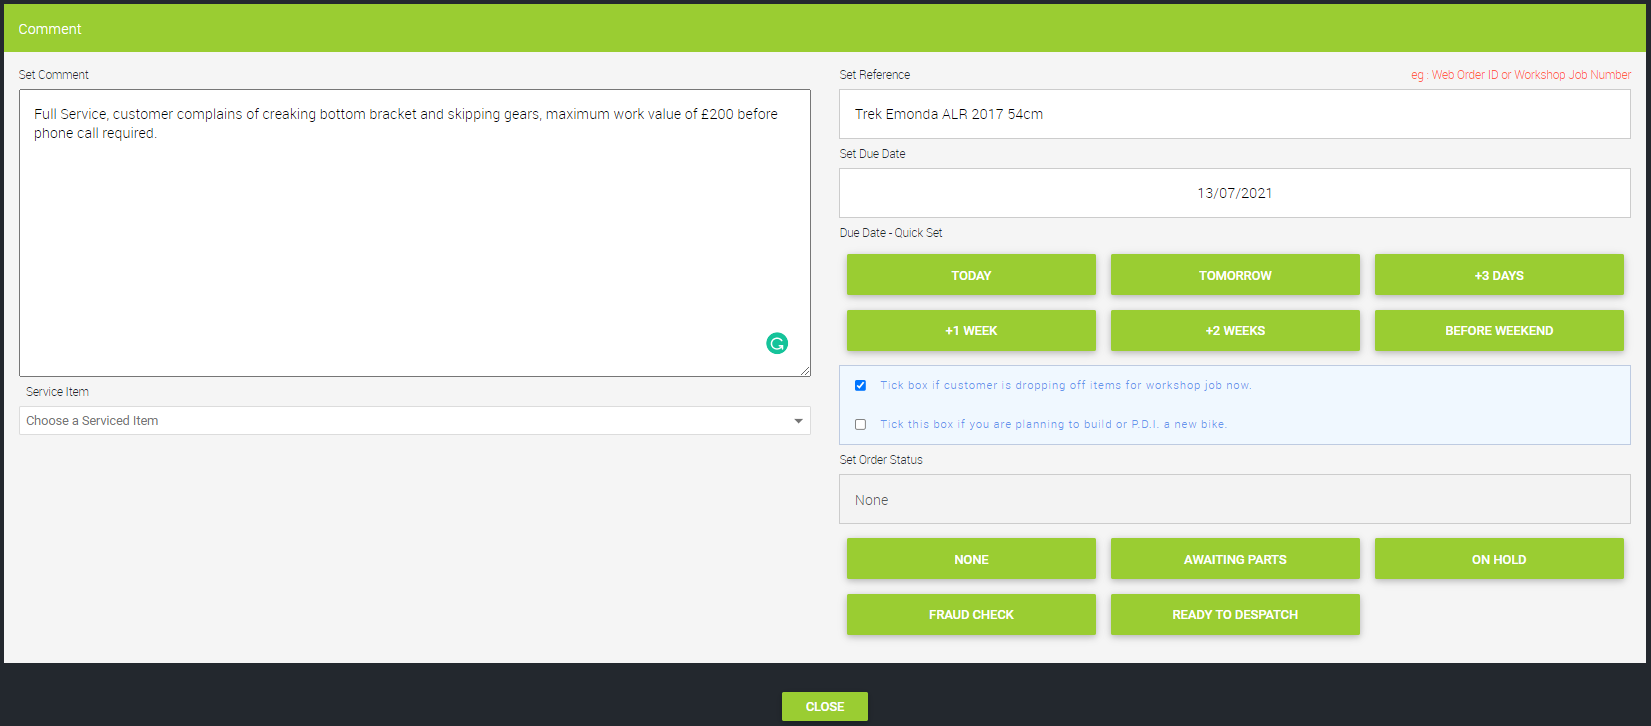
4) Set Comment - This field should be used to make sure the mechanic knows what is required when they come to carry out the work;
5) Set Reference - This should be a description of the item to be serviced (see also Service Item below);
6) Due Date - This is when the customer will be collecting the item;
7) Service Item - You can either add or select an existing Service Item (the item being worked upon). This will be recorded against the customer record, so you can easily select it in future;
8) Tick box if the customer is dropping off items for workshop job now - Use this to confirm that the customer has already left the item;
9) Tick this box if you are planning to build or P.D.I a new bike - Is this a new bike build? Use this box to confirm;
10) CLOSE - When you have entered all of the required information.
See the screenshot below for an example:

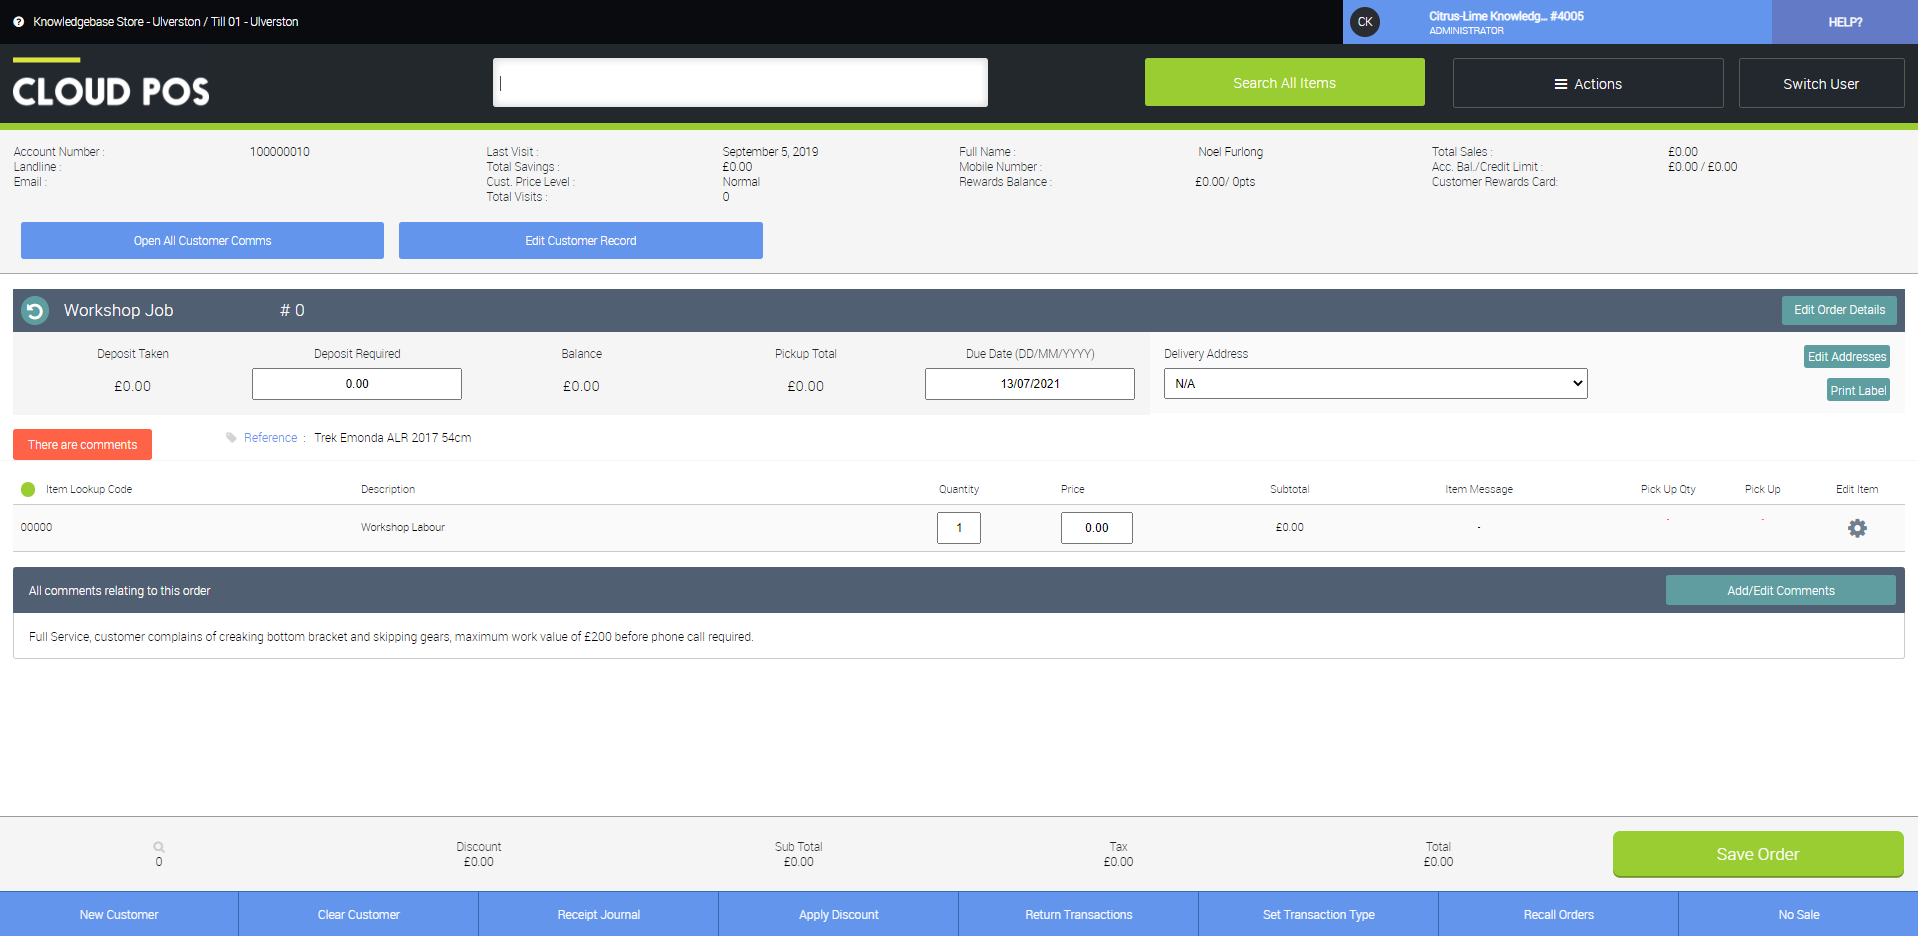
11) Once you are back on the POS screen, you can add any items that the customer is purchasing if they are required for the work. If no items are required, simply add the Workshop Labour item.
See the image below for an example:

12) When you are confident that all items are added, click the Save Order button. If you have indicated that a deposit needs to be taken for the transaction, this button will instead be titled Tender;
13) Click the Continue with Transaction on the next screen and this will save the Workshop Job.
The job will have automatically saved in the Workshop Module and will await scheduling by the staff responsible for managing the workshop calendar.
The following articles cover the rest of the workshop processes: