If you have an item on your system that has been set up as or converted into a serialised item by mistake, or you want to stop it being serialised, you can either edit the item type from the item record, or use the Modify Item Type Wizard to convert the item into a standard or non-inventory item.
NOTE: This is only possible if the item does not currently have any serial numbers assigned to it, and has never been sold as a serialised item.
Changing the item type from the item record
1) From the main menu in Cloud POS backoffice, go to Create & Manage Items, then Items;
2) Use the filters to search for the item you wish to deactivate;
3) When you have located the item, click Edit;
4) At the top of the item card, you will see a button called 'Convert Item Type'. Click this button:

5) This will open a pop up box with the option to convert to Standard or Non-Inventory. Select Make Standard and this will change your item as needed:

If the circumstances dictate that the item you wish to convert cannot be changed via the wizard, then you would need to make the existing item inactive and create a new item to replace it.
To make an item Inactive
1) From the main menu in Cloud POS backoffice, go to Create & Manage Items, then Items;
2) Use the filters to search for the item you wish to deactivate;
3) When you have located the item, click Edit;
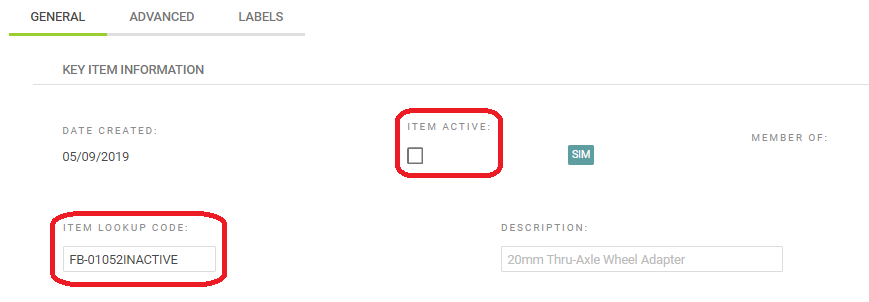
4) Untick the Item Active tick box, in the top left of the item card;
5) If you have made an error creating the item and need to use the same lookup code on a new item, type INACTIVE after the current item lookup code:

6) Next, remove any Aliases associated with the item, by clicking Delete next to each alias:

7) You will also need to remove the supplier part codes. Click Edit next to the supplier and remove the supplier part code:

8) Click the Save button at the foot of the page.
Once the original item has been deactivated, you can now create the new item using the same details.