If you have integrated one or more courier services into Cloud POS, you can generate a shipping label for any transaction or customer order in the Point of Sale.
If you need to generate a shipping label for an order that was placed on your Citrus-Lime Ecommerce site, please refer to this article instead.
Integrating your couriers with Cloud POS
If you'd like to find out more about integrating your couriers with Cloud POS, speak to your Success Team. You can give them a call or send an email to success@citruslime.com.
1) Start by adding the items to your transaction or customer order.
2) We would recommend setting a customer for the transaction or customer order at this stage. This will make it easier to generate the label, as you will be able to select from any previous delivery addresses for this customer.
3) Click the Print a courier label button in the transaction summary panel:
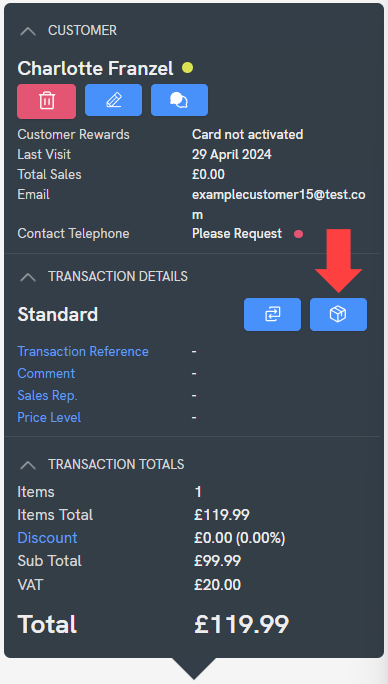
This will open the Courier Integration window.
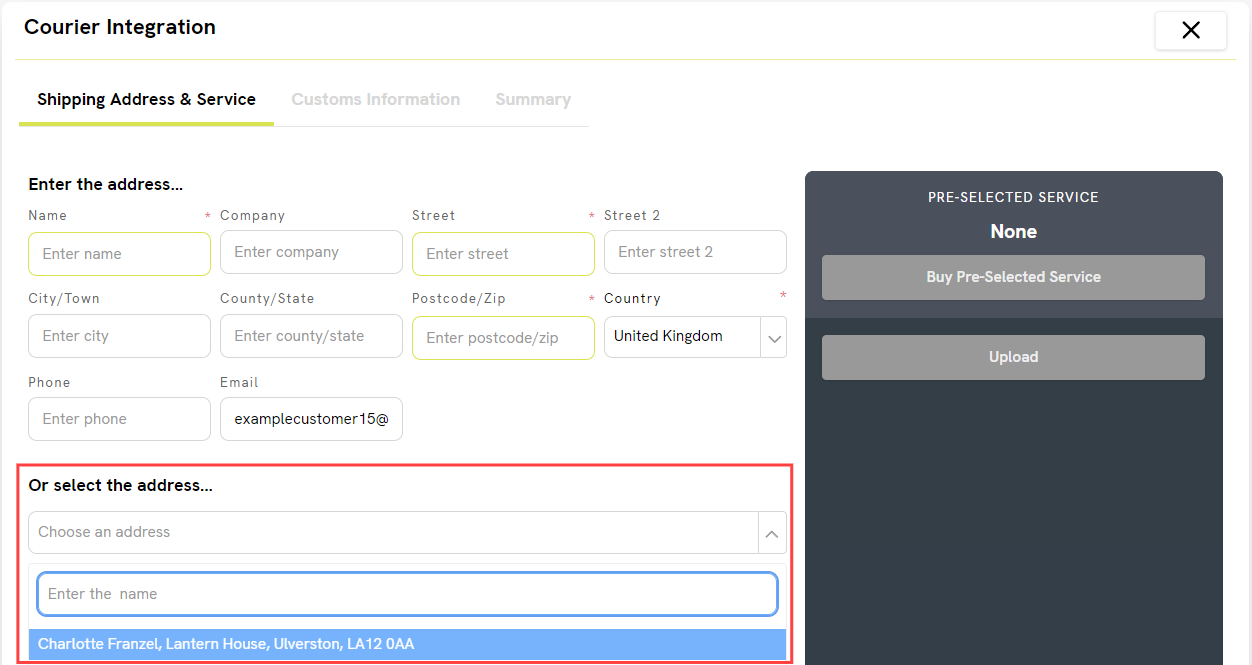
4) First, you need to complete the customer's address details. You can type the details into these fields manually, or you can select from any previous delivery addresses that you have saved for this customer:
Managing delivery addresses
You can manage a customer's delivery addresses from the Point of Sale or from their record in the Back Office. From the Point of Sale…
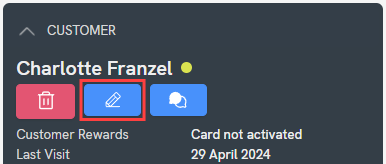
1) Click on the ‘Edit customer information’ button in the transaction summary panel:
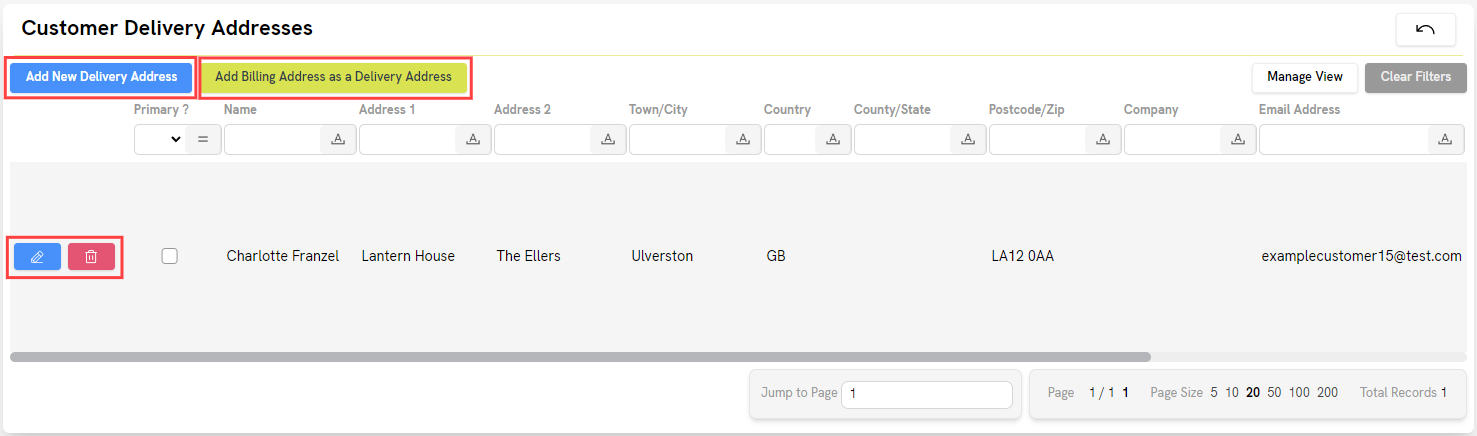
2) Click ‘View Delivery Addresses’:

3) You have a number of options on this screen. You can click ‘Add New Delivery Address’, top-left. You can choose to ‘Add Billing Address as a Delivery Address’. You can also edit or delete any existing delivery addresses using the ‘Edit’ and ‘Delete' buttons.
5) The ‘Parcel details…’ section provides some further fields:
Message: This is optional. Enter any delivery instructions that you would like to upload to the courier, for example, ‘please deliver to rear porch’.
Pre-Defined Parcel Size: Select a parcel size here. You will see the default length, width and height fields automatically change to match your selection.
Reference: Most couriers require this. If you have set a Reference for your transaction or customer order in Cloud POS, you could use the same value here. You could also use the Cloud POS order number, or a brief description of the parcel, e.g. ‘Navy Jacket’.
Customs Contents: If you are shipping the items internationally, you need to complete a customs content description for the goods, e.g. ‘shoes'.
The ‘Parcel Weight’ field will default to 500 grams, but this can be adjusted if required. The length, width and height fields are defaulted based on the ‘Pre-Defined Parcel Size’ you have selected above. Again, these can be adjusted if required.
The ‘Shipment Value’ will represent the total value of items on the transaction or order. Click ‘Items Summary’ to view the item breakdown:

6) Click Upload to proceed:
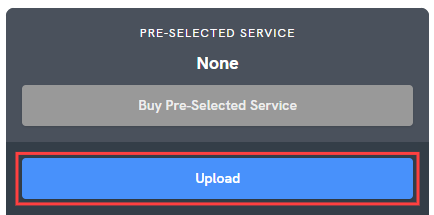
This will upload the parcel information to the Courier Integration Module. The details will be checked against any weight, location and order value rules that you have set, and the available services for your parcel will be returned in the panel to the right. (The ‘Cost’ will be the cost that you have set for this service in the Courier Integration Module.)
7) Highlight your chosen service and click Buy Label:
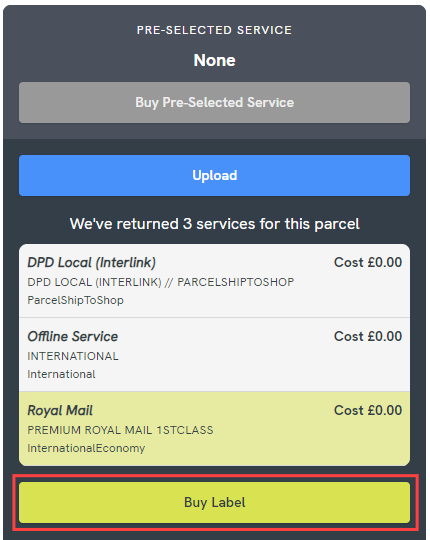
Your label has now been created with the courier.
Several things could happen at this stage, depending on your setup:
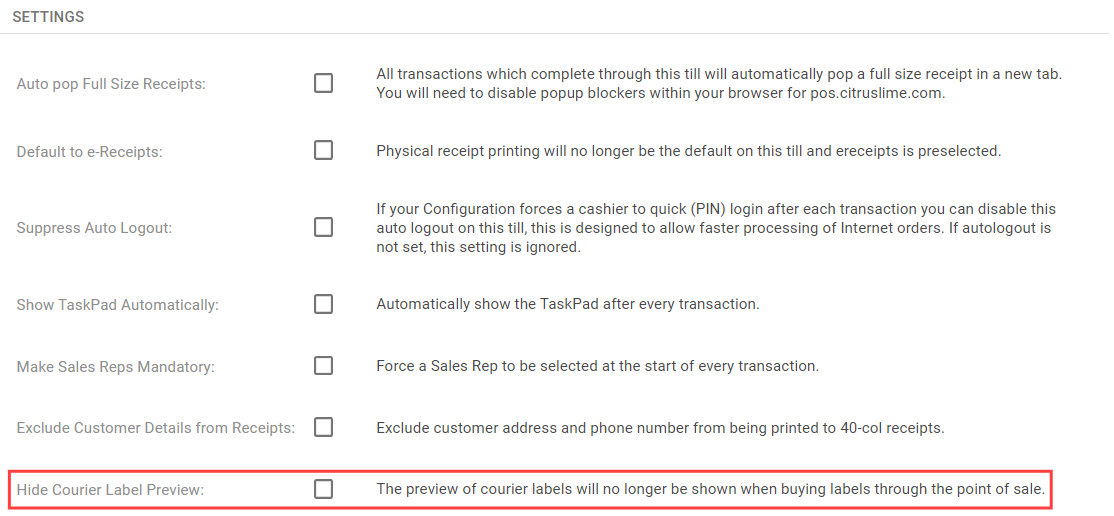
- You may see a screen where the generated label is shown. If you do not see this screen, and you are instead returned to the main Point of Sale screen, this is because someone in your organisation has chosen to skip it on this register/till. To change this setting, you can navigate to ‘Setup’ > ‘Registers & Barcode Label Printers’ in the Back Office, and amend this checkbox for the relevant register(s):
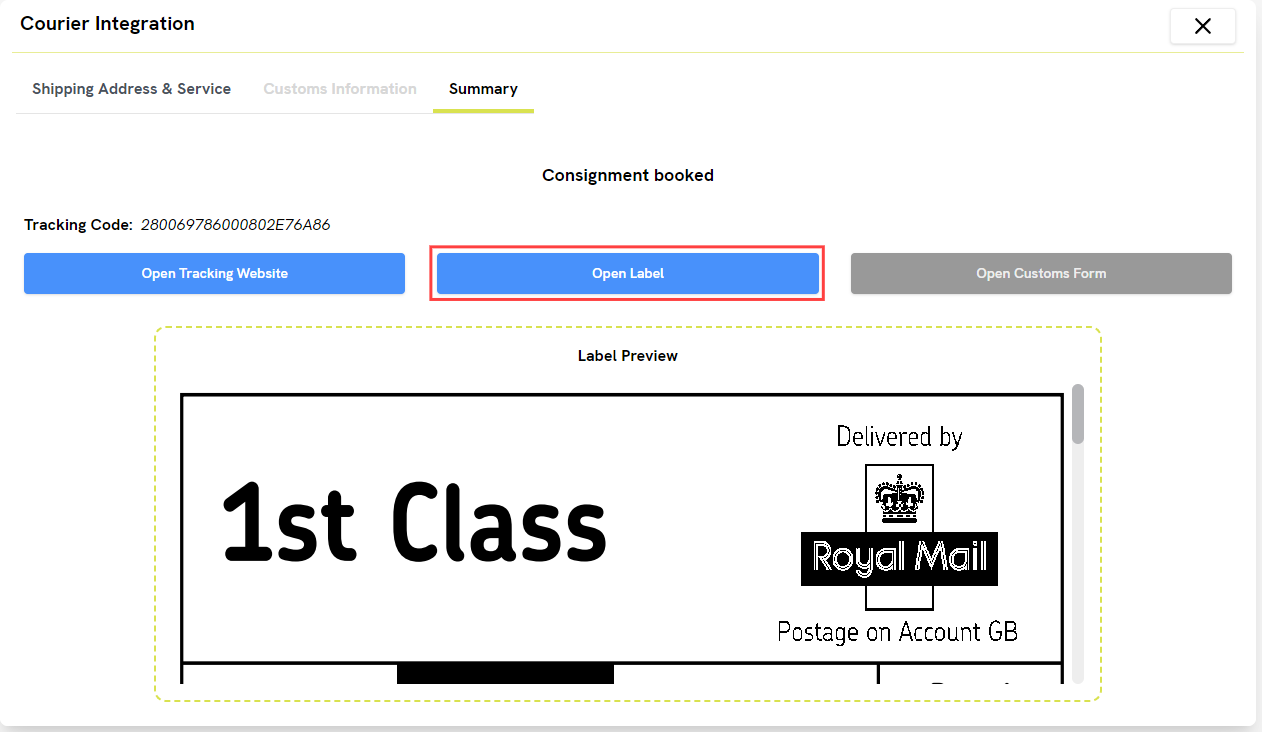
- If you have the Courier Label Printing Application installed by the Citrus-Lime Support Team, your label should automatically print from your Zebra printer. If this does not happen, you can click Open Label to view and print the label manually:
Courier Label Printing Application
If you do not already have this application installed and you would like to use it to automatically print the courier labels you generate in Cloud POS, please contact the Citrus-Lime Support Team via phone or Live Chat. Please note that the application is compatible with Windows PCs/laptops and with the Zebra label printers provided by Citrus-Lime.
- If you have booked a tracked service, an email will be automatically sent to your customer with their tracking information. (If you are unsure if this has been set up for you, please contact the Citrus-Lime Support Team.)
Now that your label has been generated, you can continue with your transaction / customer order process.