When you are ready to complete a transaction, click the Tender button:

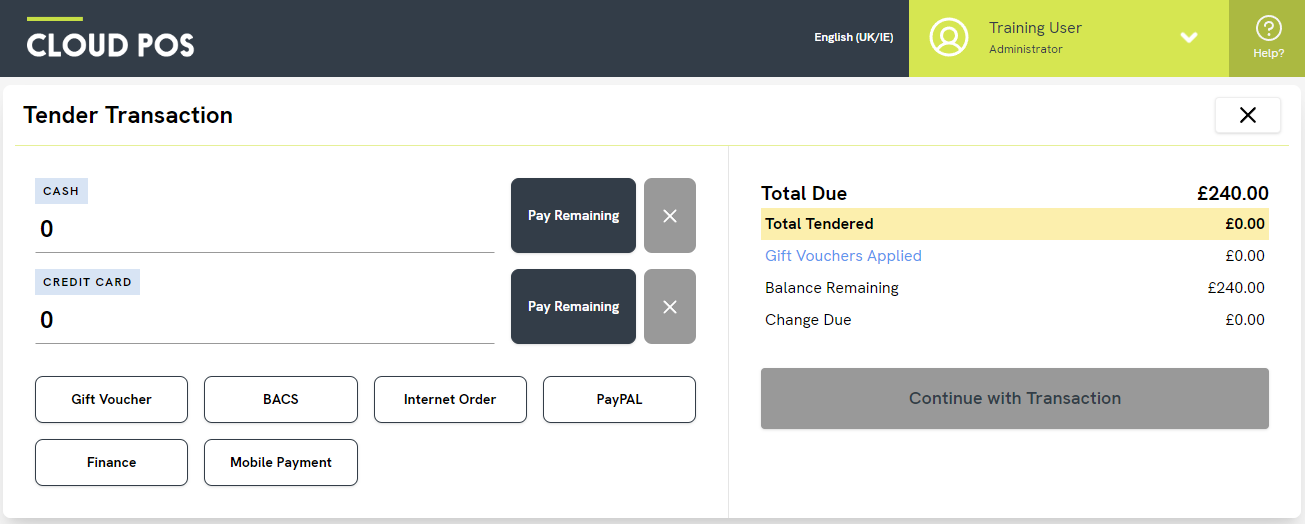
This will take you to the Tender Transaction screen:

From here you can select the tender type (payment method) the customer is going to use.
By default, we will show your first two tender types at the top of the screen and any further tender types below. (Please refer to the Frequently Asked Questions, below, for further guidance on this.)
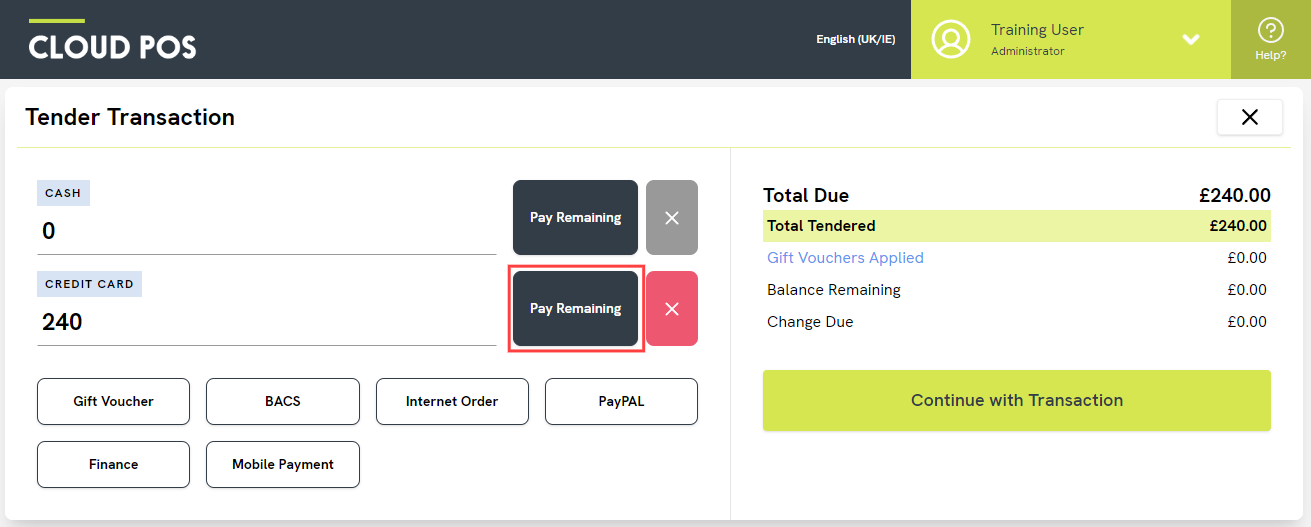
If the customer is just paying using one tender type, you can click the Pay Remaining button next to the correct tender:

This assigns the full value of the transaction in that field. Once this is done, you can click the Continue with Transaction button to proceed.
If the customer changes their mind about their choice of payment method, you can click the red cross next to Pay Remaining and this will clear the value from that field.
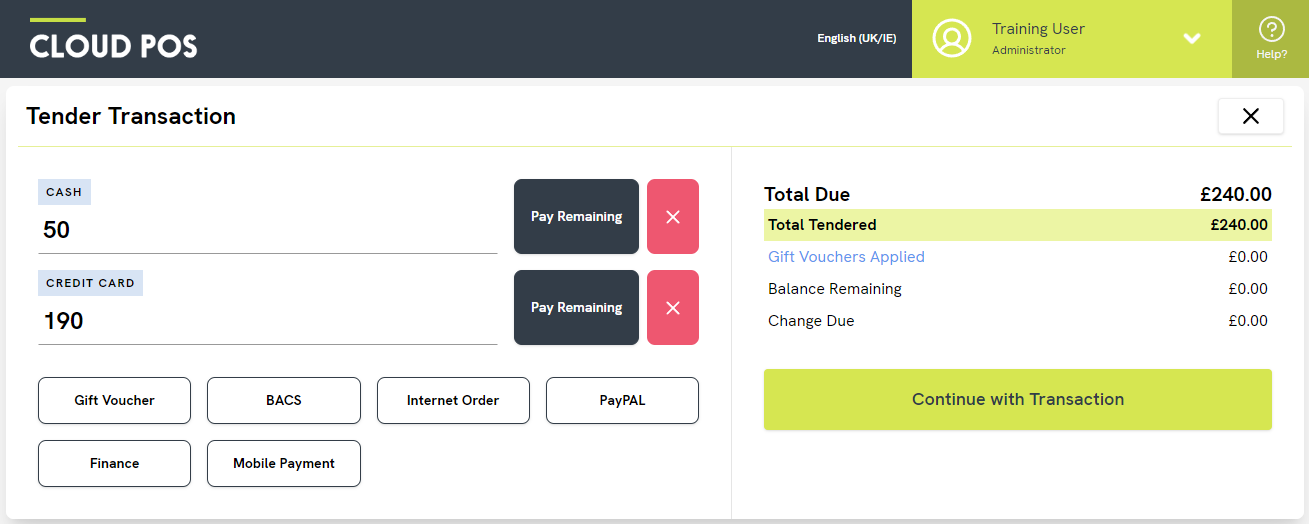
You can also accept multiple tender types in a single transaction. In the example below the customer has opted to pay 50.00 in cash and 190.00 by card.
To tender like this, you would type 50.00 into the cash field and then click the Pay Remaining button next to Credit Card. This will enter the remaining balance of the transaction into this field:

Once the fields are populated to the total value of the transaction, click the Continue with Transaction button.
Finally, you'll see the Transaction Options screen:

Make your selections as necessary, and then click the Complete Transaction button to finalise the transaction. You also have the option to click a back arrow at this stage, which will take you back to the Tender Transaction screen.
Frequently Asked Questions
What is the difference between ‘Credit Card’ and ‘Manual Credit Card’?
If you are using a card terminal that is integrated with Cloud POS, using the ‘Credit Card’ tender type will automatically send that payment amount to the card terminal, ready for the customer to present their card. During the payment process, you will see messages on your Cloud POS screen informing you of the payment status, such as ‘Awaiting Card' and ‘Awaiting Pin’. If there is any problem with the payment, Cloud POS will inform you of the issue.
If you are using a card terminal that is not integrated with Cloud POS, or you do not want to send the payment amount to your integrated terminal for any reason, you can use ‘Manual Credit Card’. This tender type will allow the transaction to complete in Cloud POS without linking to a connected card terminal.
How do I use the tender type Filters?
If you have a long list of tender types, you may wish to filter them by type.
Do do this, first click ‘Filter’, then click on the type you wish to filter by. For example, ‘Other Voucher’ could be used to group together scheme vouchers or brand vouchers.


Tender types can be configured in the Cloud POS Back Office from ‘Setup’ > ‘Tender Types’.
Can I change the tender types?
Absolutely. You can edit your tender types and choose the order in which they appear. To do this, navigate to ‘Setup' > 'Tender Types’ in the Cloud POS Back Office menu.
On the Tender Transaction screen, we show two tenders at the top by default and the rest in buttons below. This is controlled by the Display Order set on your ‘Tender Types’ page in the Cloud POS Back Office.
For more guidance on amending your tender type setup, refer to this article: How do I add new or amend Tender Types?
Can I add text to my receipts?
Yes, you can add additional text to both 40-Col receipts and Full Size Receipts. Please refer to the following articles: