You can send emails and text messages to your customers from Cloud POS. You can also receive text message replies in Cloud POS.
In addition, you can add Notes to customer records. These are internal-only and do not send to customers.
You can send and view these communications from multiple areas of the Cloud POS platform. Click the button to view the section you need:
Communicating from the Point of Sale
Communicating from the Workshop Module
Communicating from the Cloud POS Back Office
Using the Message Hub
Communicating with a customer from the Point of Sale
Have you tried the Message Hub?
If you'd like to view your communications with all your customers from a single screen, you can use the Message Hub, instead of choosing an individual customer to communicate with.
First, set the customer you wish to communicate with.
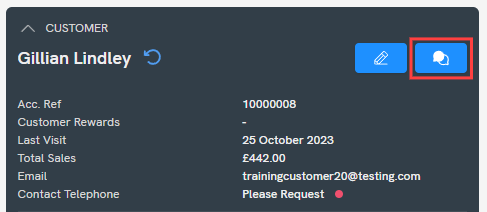
To access the Customer Communications panel, click this button in the transaction summary panel:
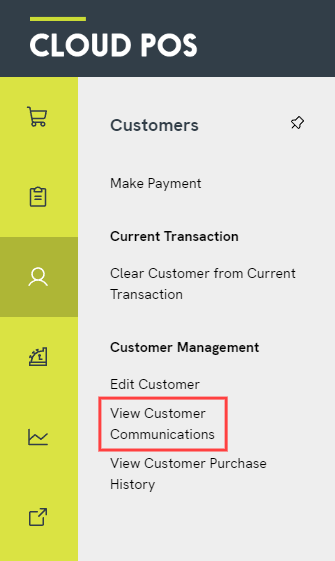
You can also access this panel by clicking into the Customers menu and then View Customer Communications:
Both options will open the Customer Communications panel.
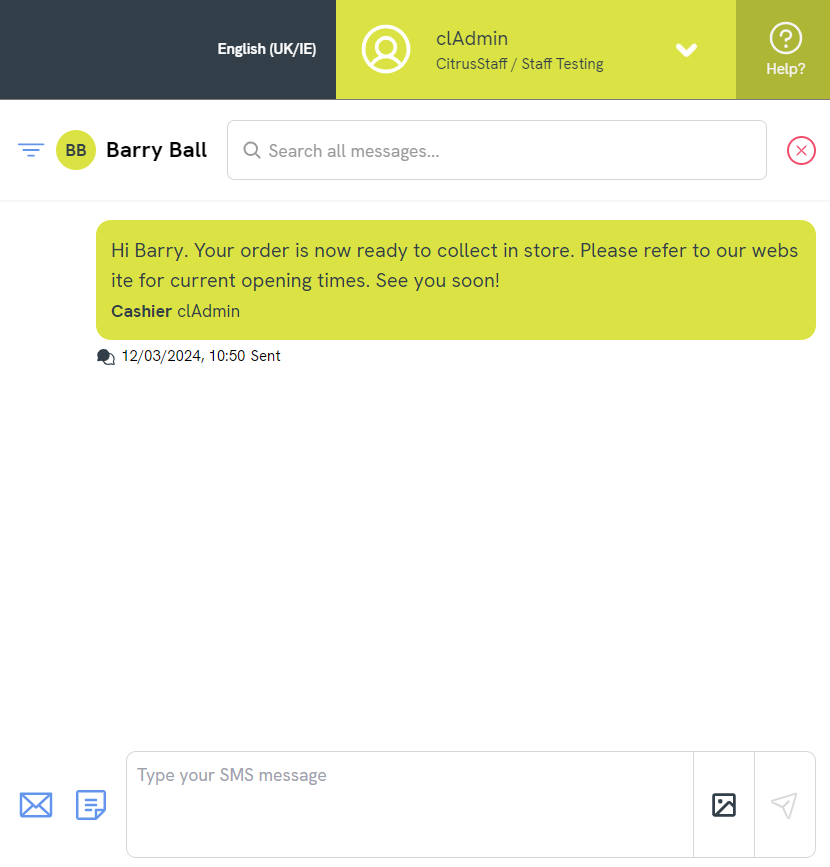
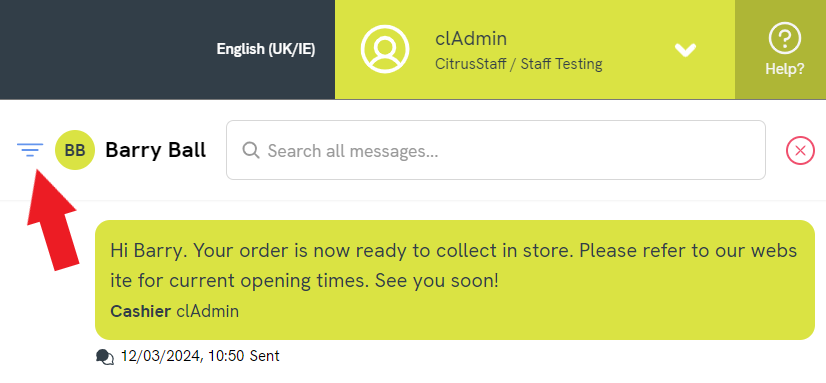
Here you can view all your previous correspondence with this customer via email and text. You can also view any internal Notes attached to their record. If you would like to filter for a specific communication type, e.g. email, use the Filter icon, shown here:
You can also use the Customer Communications panel to send a new communication to the customer.
a) To send a text message to the customer, you can simply begin typing at the bottom of the panel. Click the Send icon to send:

If you'd like to include an image with your message, click the image icon:

A window will open in which you can either add a link to an online image, or drag / upload image files from your own machine:
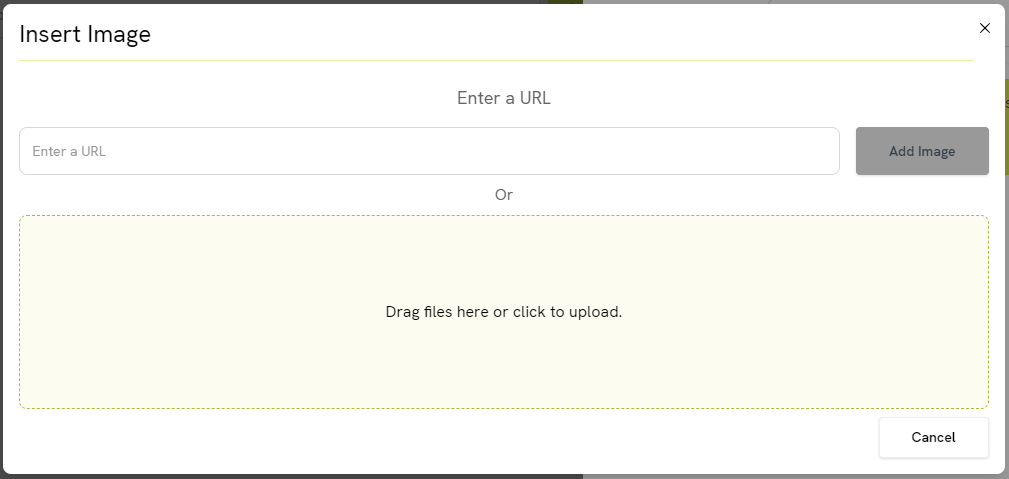
Supported file types are .jpe, .jpeg, .jpg, .gif, .png, and you can upload a maximum file size of 30MB per message.
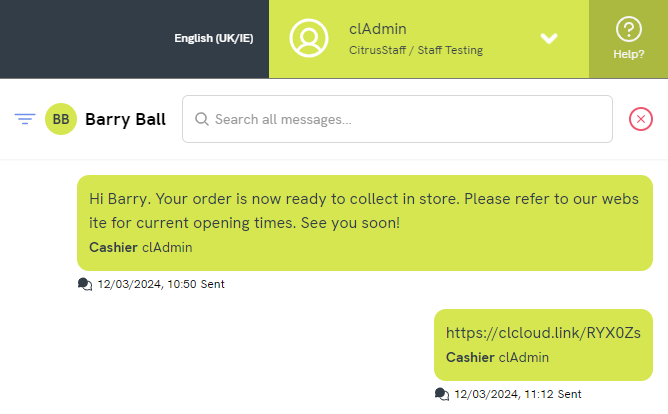
When you add your own image, this will create a link to the image itself which your customer can then open:
Viewing replies from your customers
You can also view your customers' SMS/text message replies in the Point of Sale. For full information on this feature, please refer to the following article:
How do I use the 2-way SMS/text functionality in Cloud POS?
The Message Hub will also show all of your customers' SMS/text message responses in one place.
b) To send an email to the customer, first click the Email icon in the bottom left of the panel. This will open a new window.

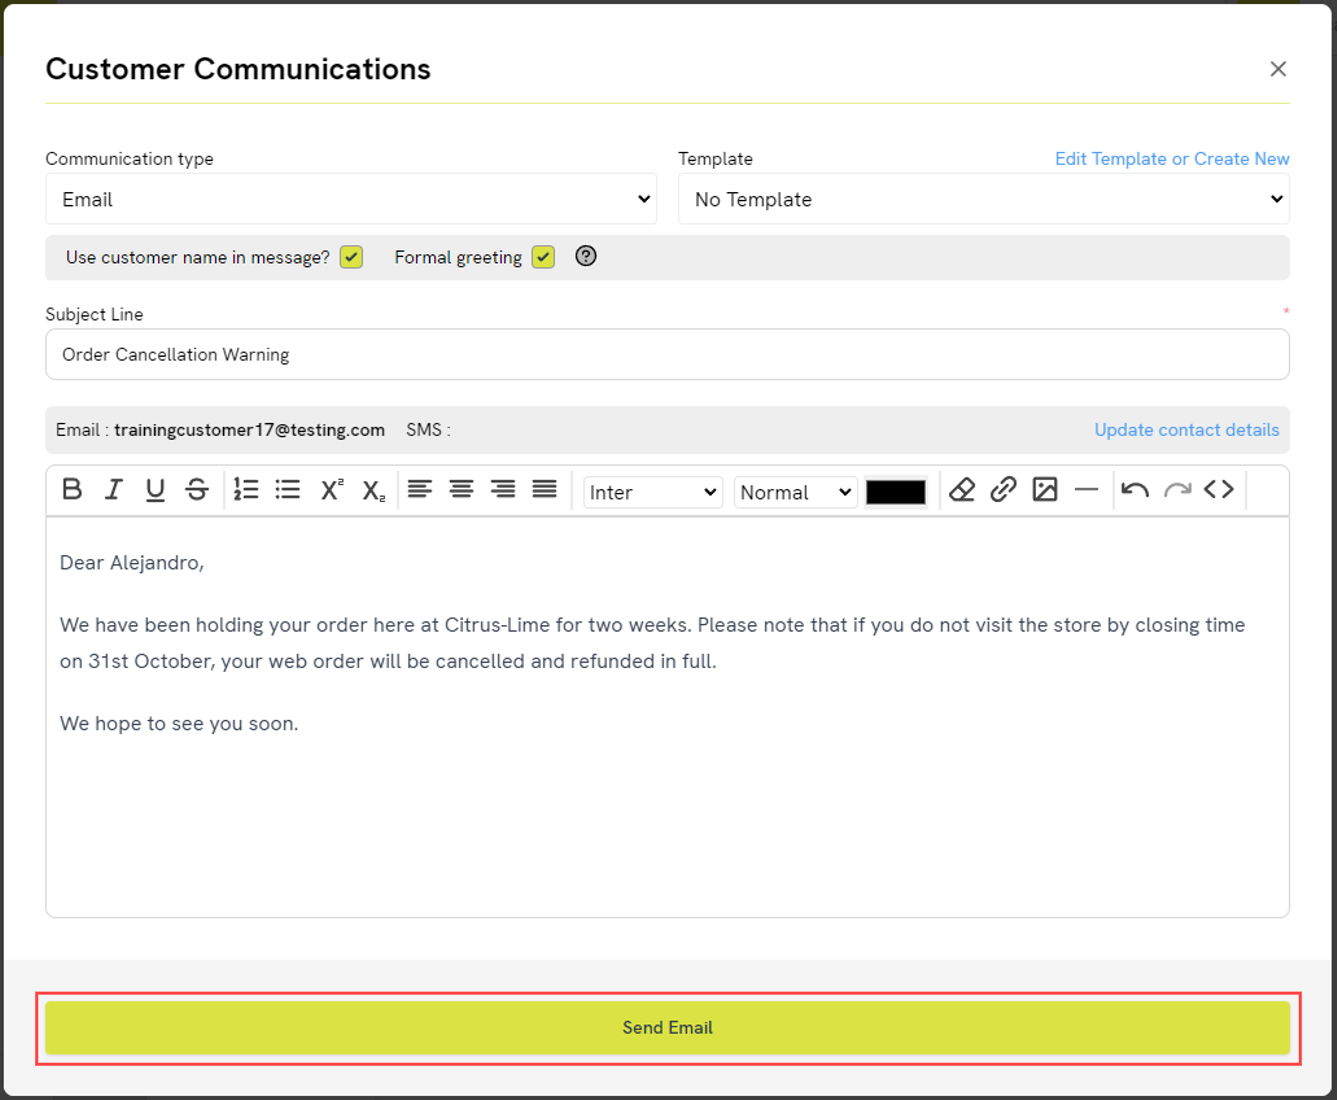
You will see the Communication type has been set as 'Email'. (You can use this drop-down to change your selection, if needed.) You also have access to your Communication Templates on this screen. Please refer to this article for more guidance on creating and editing templates: Customer Communications Tool // How do I create Communication Templates?
The option to Use customer name in message? will be selected by default — you will see the customer's first name in the message window below. If you do not wish to begin your message in this way, simply untick the box. If you select Formal greeting, the greeting will change to use the customer's title and last name (if a title has been set on their record), or their first name with 'Dear John' instead of 'To John', for example.
You can enter a Subject Line for your email. If you have chosen a Communication Template, this will be pre-set, but you can make amendments if needed.
Use the message window at the bottom to type your communication. Again, this will be pre-set if you have selected a Communication Template, but you can make amendments if needed.
When you are ready to send, click Send Email. You will see a dialog box confirming that your message has been sent successfully:
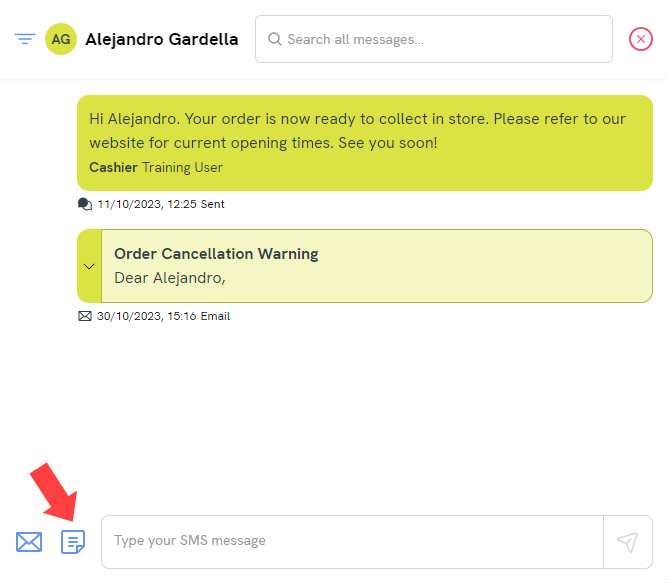
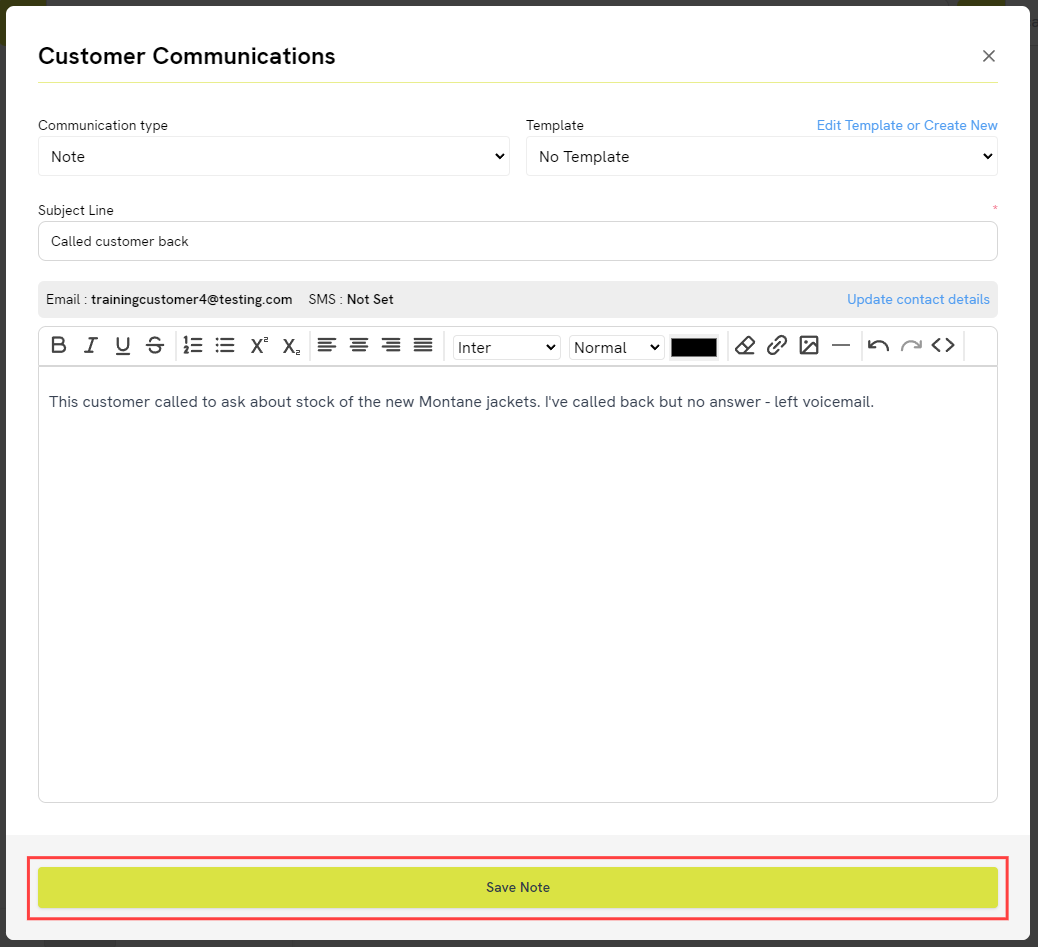
c) To add a Note to the customer record, click the Note icon in the bottom left of the panel. This will open a new window.
You will see the Communication type has been set as 'Note'. (You can use this drop-down to change your selection, if needed.) You also have access to your Communication Templates on this screen. Please refer to this article for more guidance on creating and editing templates: Customer Communications Tool // How do I create Communication Templates?
You can enter a Subject Line for your Note. If you have chosen a Communication Template, this will be pre-set, but you can make amendments if needed.
Use the message window at the bottom to type your Note. Again, this will be pre-set if you have selected a Communication Template, but you can make amendments if needed.
When you are ready to save, click Save Note. You will see a dialog box confirming that your Note has been saved successfully:
Notes for specific customer orders
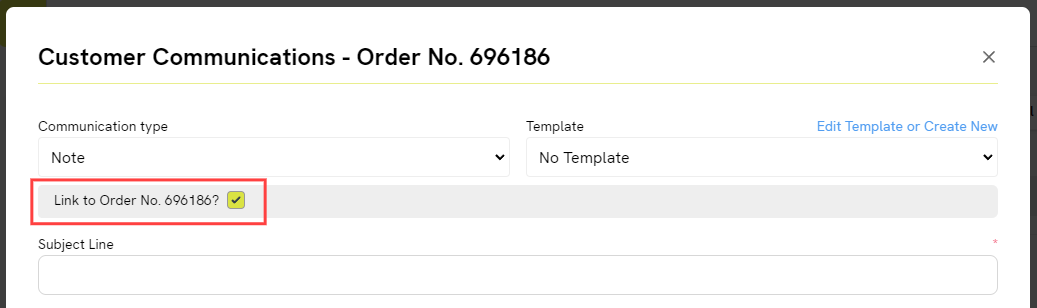
If you create and save a Note in this way, it won't be linked to a specific Special Order, Layaway, Workshop Job or Quote. If you would like to add the Note against a specific order, recall that order into the Point of Sale before opening the Customer Communications panel.
You will then see the option to link the Note with that order:
Communicating with a customer from the Back Office
Have you tried the Message Hub?
If you'd like to view your communications with all your customers from a single screen, you can use the Message Hub, instead of choosing an individual customer to communicate with.
There are a few places in the Back Office where you can communicate with customers, such as the Customer Orders page. This is useful for if you need to message a customer about a delay in delivering their order, for example.
You don't need to have an open order for a customer to communicate with them – you can message them at any time from their customer record in the Back Office.
1) In the Back Office menu, expand the Customers heading, then click on Customers:

2) You will be presented with your existing customer database. You can search the grid to locate the customer you wish to communicate with, then double click on that customer to open their record.

3) Scroll down to the Contact section, then choose if you want to Send Text or Send Email to open the Customer Communications window:

Communication preferences
You will note that there is a 'Contact Preference' next to the 'Send Text' and 'Send Email' buttons. This reflects the customer's preferred method of communication – it does not enforce the use of a particular communication type.
4) The Customer Communications panel will open on the left:

5) The Communication type drop-down will be pre-set depending on the button you clicked in the previous step (Email, SMS or Note). You can change your selection here, if needed. Email and SMS/text message are outbound communications. Notes are internal and will not be sent to the customer.

6) You can opt to use a Template by selecting one from the drop-down list provided.
The templates displayed in the drop-down list are relative to the Communication Type you have selected. For example, if you have selected Email as the Communication Type, then only Email Communication Templates will be present in the drop-down.

Please refer to this article for more guidance on creating and editing templates: Customer Communications Tool // How do I create Communication Templates?
7) The Subject Line describes the context of the communication you are composing to send or save. This is a required field. If you have opted to use a template, then the Subject Line will be populated for you, but you can make amendments if needed.

8) If you have selected a template, you can choose to automatically set the customer's name in the message, or you can decide to do this yourself manually.

This box will be ticked by default. This means that the customer's first name will be used automatically in the composed communication. Ticking this box helps to prevent mistakes in the spelling of a customer's name and speeds up the communication process when using a template. If you untick this box, then you are free to address the recipient in your own style.
9) You also have the option of using the default informal style of greeting (e.g. 'Hi John') or switching to a formal style (e.g. 'Dear John' or 'Dear Mr Brown').

10) You can now view and edit your communication. If you have selected a template, you will see the template body in the message field, prefixed according to the greeting settings you applied in the previous tab. If you have not chosen to use a template, the message field will be empty.

11) Once you are happy to proceed, click Send Email, Send SMS or Save Note (depending on your communication type).
When you have successfully sent or saved a communication, a confirmation will be presented to confirm this:

A note on greetings and signatures
Please note that the options for automatic greetings and signatures are only available when using a Communication Template. If you wish to make use of these options when composing a unique message to a customer, you could consider creating a Communication Template that only contains a signature, so that you can type the message content each time.
Viewing past communications
The Messages & Communications tab on the customer record contains a searchable/filterable list of all communications previously sent (or saved) to this customer. SMS/text replies are also shown here.

Clicking the View Content button next to a communication opens a pop-up showing the full content.

Using the Message Hub

The Message Hub allows you to view and create communications with all your customers from a single screen. This includes text messages, emails and internal Notes.
You can find a link to the Message Hub in two places:
a) In the Back Office menu, navigate to Customers > Message Hub:

b) In the Point of Sale menu, navigate to the Customers section and then click Message Hub:

On the left of the screen, you will see some search and filter options:
- New Conversation: Click this button to write a new message to a customer. It will reveal a search field for you to locate the customer in your database. (If you select a customer you have communicated with previously, their conversation history will load automatically.)
- Search customers: Use the field to search through your current customer conversations — in other words, customers you have messaged in the past. If you want to communicate with a customer from Cloud POS for the first time, use the New Conversation button instead.
- Show All Stores: By default, only conversations that feature at least one communication from someone at your current store will show in the list. If you switch 'Show All Stores' to 'ON', conversations from all your stores will show in the list. Please note that this option will only display if you have more than one store set up in Cloud POS, and it will only show in the Back Office view, not in the Point of Sale.
- Show Only Unread Messages: Use this to filter the conversation list to only show conversations with at least one unread incoming text message.

Once you have selected a customer conversation, your previous correspondence will display on the right of the Message Hub:

From here, you can:
- type and send a new text message to the customer (including image attachments, if needed)
- read text message replies they have sent you
- mark those text message replies as read/unread (left click on the message to change the read/unread status)
- send a new email to the customer
- add an internal Note (for example, noting a phone call with the customer)
- search through the customer's conversation history
- filter the conversation history by type (text / email / Note), or by date, using the filters at the top of the screen:

When using a template for a communication or writing a Note in the Message Hub, you can collapse the compose panel using the arrow icon to the left of the panel. This allows you to scroll back through the conversation history — for example, to copy information from a previous message — and then return to your draft without losing it.

To expand the panel again, click the arrow icon once more.
If the panel is collapsed and you select a different customer, you will see the following warning:

Clicking Yes will discard your unsent message and load the new customer's conversation. Clicking No will return you to your draft.
Frequently Asked Questions
What is the sending address on my email communications?
You can set your sending email address in the Back Office. You can set a different email address for each store, if required. Navigate to 'Setup' > 'Stores' and click on the store you wish to amend. You can enter the sending email address into the 'Customer Services Email' field, as shown here:

The email address you have specified here will appear to recipients as the sender's email address and will also be the address that receives any replies from the customer. You will not see those replies in Cloud POS.
Is there a limit to the number of Communication Templates I can create?
No. You can create as many Communication Templates as you need.
You can read more about creating and using templates here: How do I use Communication Templates?
I have more than one location in Cloud POS. Can I create different Communication Templates for each store?
Communication Templates are shared across all stores in your Cloud POS group. If you would like to create specific templates for each store, you can do so, though all other stores will still have visibility of them. For this reason, you might like to title your templates with a store prefix, to make template selection easier for your team.
For example, if you are creating templates for notifying customers when their order is ready to collect, you may title these as follows:

Your customer does not see the title of the communication.
I don't think my customers are receiving my emails — what can I do?
The nature of email means that it is not a 100% guaranteed technology, so although when we send an email we can be confident we have sent it, there is no absolute guarantee that the recipient will receive it. However, there are steps you can take to ensure emails that you send from Cloud POS have the best possible chance of being delivered to the recipient.
In order to improve your email delivery rates, we always recommend creating an SPF record and a DKIM record in the DNS settings for your domain. This tells the recipient server that you have given Cloud POS permission to send emails on your behalf.
Please refer to the following article for more guidance: How do I help to ensure my emails sent from Cloud POS have the best chance of being delivered?