On each item record in the Cloud POS Back Office, you have the option to set multiple levels of pricing. This allows you to dictate different prices for an item, depending on where in your platform the item is to be sold (and who it is sold to).
Price Levels are found on each item record, under the Advanced tab:
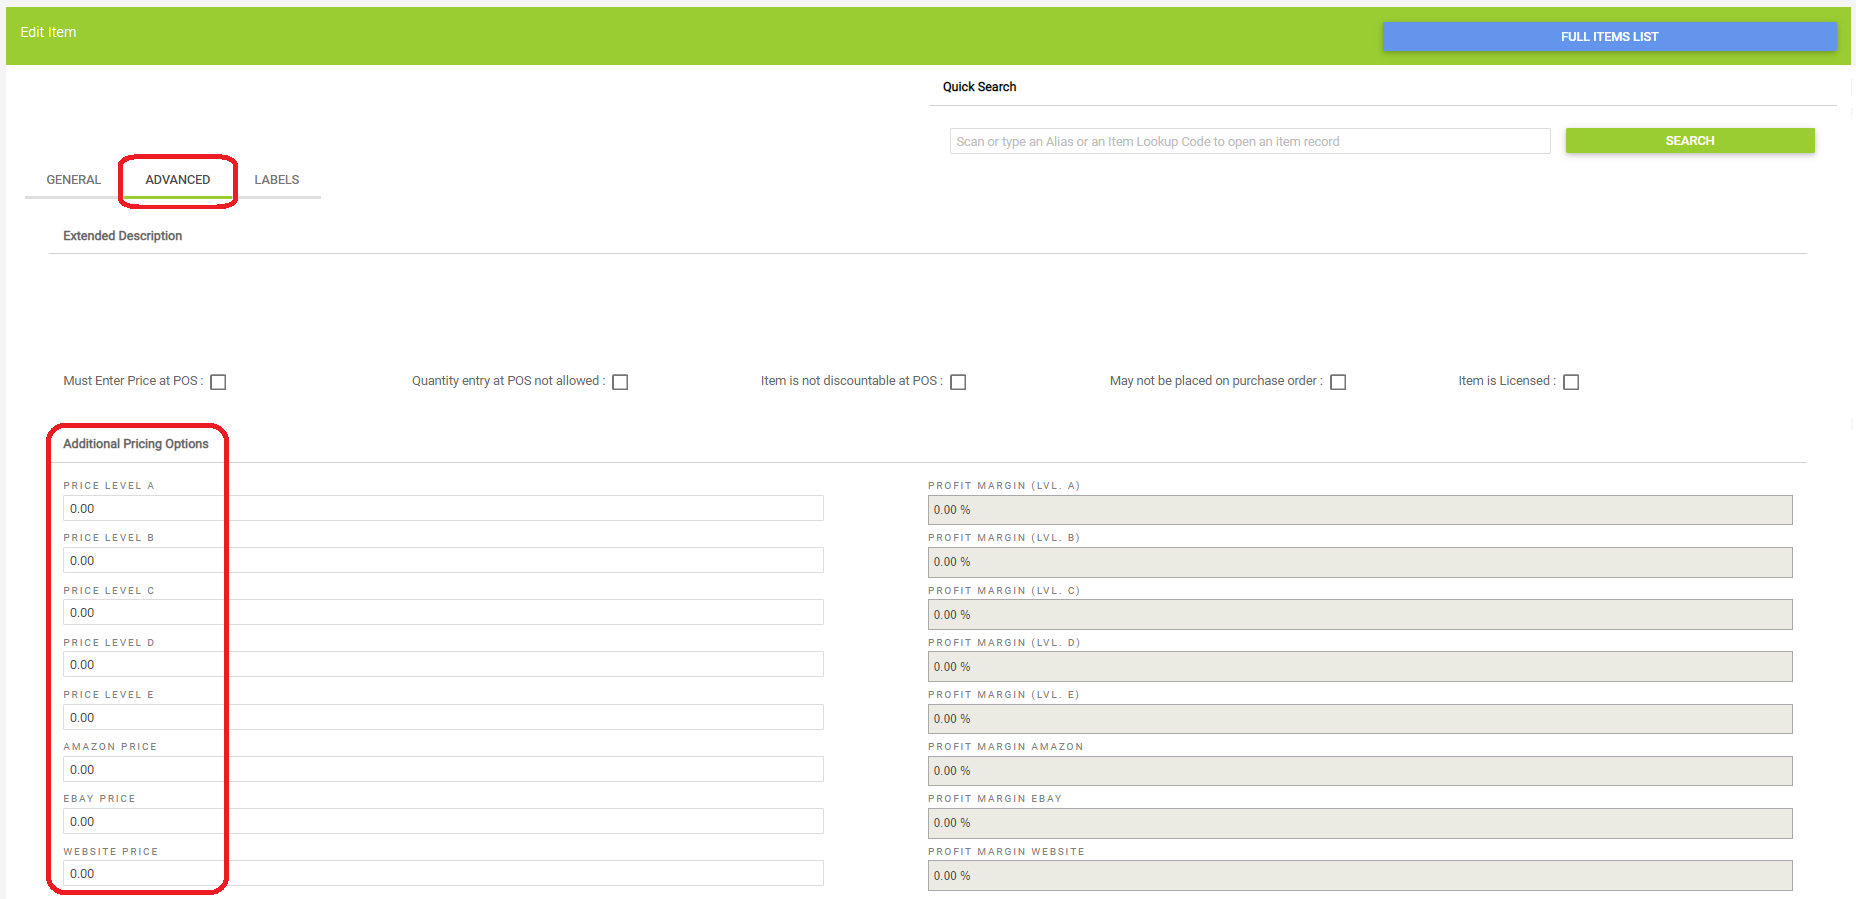
How do Price Levels work?
Price Levels A to E are used for in-store pricing only. If you have an Ecommerce site with Citrus-Lime, these Price Levels are ignored.
Amazon Price is the price that will be used as the selling price, if you use the Amazon integration. If this is left blank, we will use the lower of either the Price or the Sale Price.
eBay Price is the price that will be used as the selling price, if you use the eBay integration. If this is left blank, we will use the Website Price. If this is also left blank, we will use the MSRP of the item (not the Price or Sale Price).
Website Price is the price that will be used as the online selling price, if you have an Ecommerce site with Citrus-Lime and the Website Price is lower than both the standard Price and the Sale Price. If this is left blank, we will use the lower of either the Price or the Sale Price.
During in-store transactions, Price Levels will override any percentage discount set on a customer's account:

If a customer record has both a Price Level and a discount percentage set, the transaction will use the Price Level if one is present on the item, and if not, the discount percentage will be used.
How would I use Price Levels A to E?
You can use these Price Levels to specify up to five alternative prices to the standard Price. There are two ways you can then use these options.
1) You have the option to apply the Price Level directly to a transaction in the Point of Sale. Typically this would be used to provide a one-off discount.
For example, if the standard price of an item is £2.99, you might set Price Level A to be, for example, £2.75:

When the item is added to a transaction in the Point of Sale, it will add at the standard price of £2.99. You can then go to the Sales and Returns menu, and use the Set Price Level function:

Any items in the current transaction with a ‘Price Level A’ set will now be sold at that price. Any items which do not have a ‘Price Level A’ set will be sold at their regular Price (or Sale Price, if the item is currently on sale).
Although we have used Price Level A in this example, the exact same principle applies to the other Price Levels.
2) You can set a customer to use a particular Price Level, so that they always pay at that Price Level whenever they purchase an item which has that Price Level set. You might use this option to provide a discount to members of staff, or club members, for example.
To do this, navigate to the customer's record in the Cloud POS Back Office. Scroll to the Price Level section, use the dropdown menu to set the Price Level, and then Save the customer record.

When you set this customer in the Point of Sale, you will be asked if you would like to apply their custom Price Level to the transaction:

Selecting ‘Yes’ will set any items with the relevant Price Level (here, Price Level B) to that price. Any items which do not have this Price Level set will be sold at their regular price (or sale price, if the item is currently on sale).
Price Levels and Sale Prices
If an item is on sale, and the Sale Price is lower than the Price Level applied to the transaction or the customer's account, then the sale price will be used. Similarly, if the Price Level is lower than the Sale Price, the Price Level will be used.
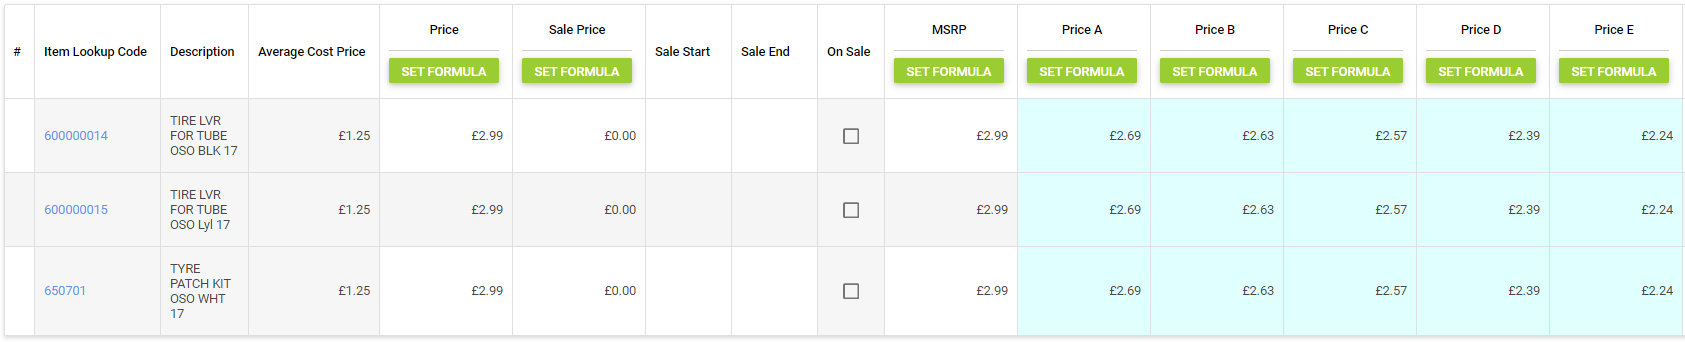
How do I set Price Levels in bulk?
You can use the Modify Item Price & Sale Price Wizard to modify each of the fields mentioned above.
In the example below, we have used the formulas within the wizard to apply different percentage discounts from the standard price of each item: