To be able to process a transaction through the Point Of Sale, you'll first need to add the item(s) that are being purchased.
There are three ways you can add items to a transaction in the Point Of Sale.
Quick Scan
By default, the cursor in the Cloud POS register sits in the Scan Barcode or Enter Item Lookup Code field at the top of the page:

Using your barcode scanner, scanning the product barcode will add the item to the transaction.
Using the Item Lookup Code or Description
You can type either the item lookup code or item description into the Scan Barcode or Enter Item Lookup Code field at the top of the page.
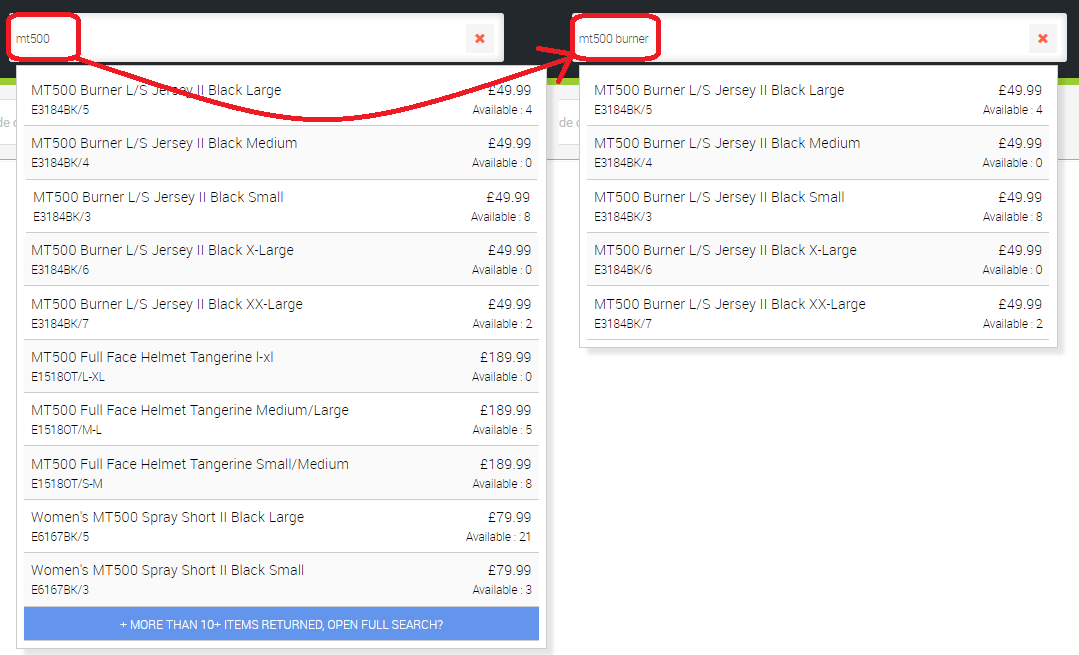
As you start typing, results will begin to appear that match what you've typed so far, with the results becoming more specific the more you type:

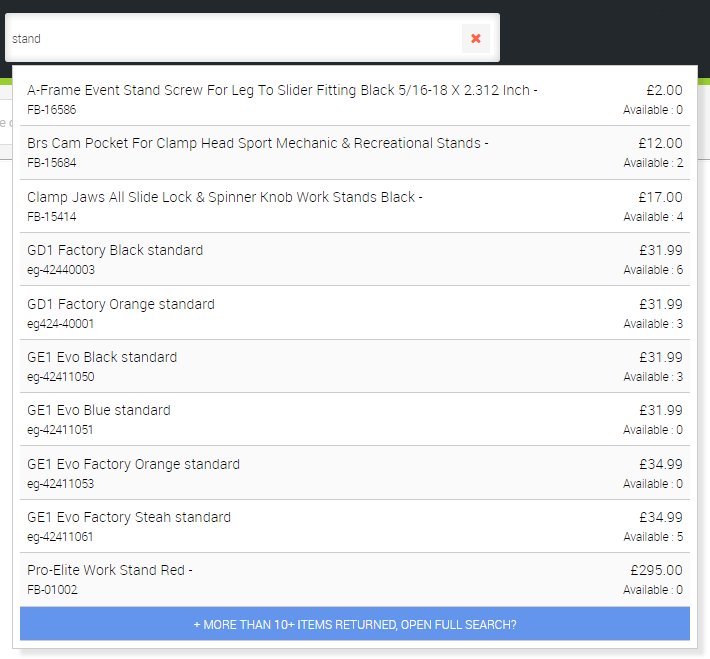
The search functions are keyword and so will find the word anywhere in the item data. For example, searching for ‘stand’ will return any items with the word ‘stand’ anywhere in the item description, as in the example below:

You can then select the item once you see it in the search results returned.
Searching for an item
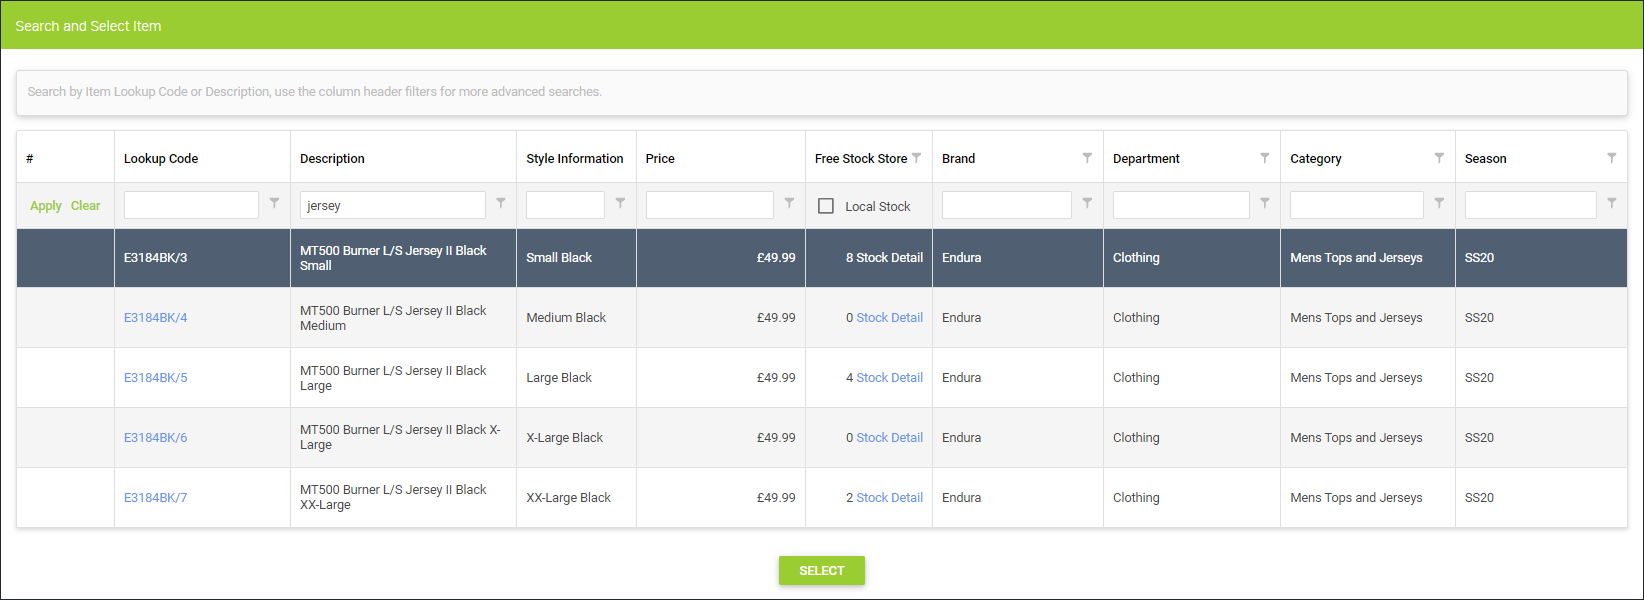
Click the Search All Items button on the POS screen, and this will open the Search and Select Item screen:

To search for an item, type into the column filters and either click Apply, or hit the Enter key on your keyboard. You can use as many column filters as required to make your search more specific. You can also tick the Local Stock box to only return results for items that are in free local stock.

The search functions are keyword and so will find the word anywhere in the item data. Searching for ‘jersey’ in the Description field will return any items with the word ‘jersey’ anywhere in the item description.
Double-click on the line of the product you require, or highlight the line and click the Select button.
The item will then be added to the main POS screen.
You can only select one item at a time, so you'll need to repeat any of the above methods to add further items to the transaction.